
Everything You Wanted to Know about Publishing a Picture Book (But Didn't Know Who to Ask):
Part 1—Introduction
Part 2—Writing
Part 3—Illustrating
If you've followed the instructions in the first three articles in this series, you should now have the text and the illustrations you’ll need to indie publish a picture book. Great! This last article will show you how to combine all these elements into pdf files that you can upload to CreateSpace, so you can finally publish your book.
Create the File for
the Interior of Your Finished Book
Until now,
you've probably been creating or scanning and manipulating artwork in a
pixel-based art program, like Adobe Photoshop (the industry leader) or Corel
Photo-Paint (what I use, because it’s great and much cheaper than Photoshop).
At this point, you'll probably want to transfer your illustrations to a
vector-based design program, like Adobe Illustrator or CorelDRAW. This will
make it easier to turn your illustrations into a multi-page PDF, which is the
format your book will need to be in so you can upload it for publishing.
Click File
and then New to create a new document in your vector-based design program and
format it to fit the correct size, number of pages, color format (CMYK), and
dpi (300) for your book. Here’s an example of a file setup from CorelDRAW for a
40-page book with an 8.5” by 11” trim size:

Import your
finished artwork page by page to the correct page it’s meant to go on in the
finished book and fit it so that it exactly fills the page. (Using “Snap to
Page” can help you make sure that you reach the edges exactly.) Once you've
done this for all of your pages, save the document before continuing.
Insert Text
Open your
Word document with all the lines of text for your story (as well as the
copyright page and any other extra pieces of text that are going to go into
your book) already formatted in the font, size, and leading that you want in
your finished book. As I mentioned in the second
article of this series, I asked my writing friends about font size, and
most of them said that 16 was the right size font for picture books. I went
with 20, because anything smaller seemed to disappear on the page, but 16 is
certainly acceptable. It’s also recommended to use a san serif font, like
Helvetica or Arial, for picture books, because younger eyes find these simpler
fonts easier to read. (I chose Arial Rounded, because the rounded look seemed
to fit the fairy-elephant look that I was going for.) A wide leading (space
between lines) also makes text easier to read, so a leading between 1.25 and
1.5 should work well. Copy and paste each piece of text from Word into the page
it’s meant to go on, and then save the file again.
Layout Your Book
Make sure
text is legible and contrasts with the background. Make text on dark
backgrounds light, and make text on light backgrounds dark. If the background
has a variety of colors, it might help to put a partially see-through dark or
light background between the text and the part of the illustration where the
text goes. You can also use the opposite of the color that’s in the background.
For example, if the background is dark blue (which is a combination of cyan and
magenta), yellow is the color that will best make the text stand out.
When I was a
layout artist for a newspaper, I learned that black and red don’t work well
together. Give it a try, and you’ll see how red text seems to disappear against
a black background, and black text seems to disappear against a red background.
Switch one of the colors for white or yellow, and you’ll also see how much
better these colors work with black and red.
You can also
apply drop-shadow to the text to make it stand out a bit more, like I did in
this page from Fay Fairy’s Very BIG Problem:
 |
| A page from Fay Fairy’s Very BIG Problem |
Add the text
for the inner title page, copyright page, and any other extras that are meant
to go into the book (like a dedication, a note about the author, or added
information about the book or other picture books by the same author). Except
for the copyright page, convert each finished page into a bitmap. (In CorelDraw
X7, for example, that requires clicking on Bitmaps at the top, and then “Convert
to Bitmap” on the top of the drop-down menu.) Once you do this, the text (as
well as drop shadow and any other elements) will become a fixed part of the
illustration. Later on, you won’t be able to undo it, so don’t convert your
pages to bitmaps until you’re absolutely sure the page is the way you’re going
to want it in the finished book, text included. I recommend saving the file every time you
convert a page to bitmap, just in case the program crashes at any point. It
probably won’t, but large 300 dpi files take up a lot of memory, so it’s best
to play it safe.
You can also
convert the file containing your cover, back cover, and the spine of your book
to bitmap, although I highly recommend you first give it a new name, so you can
still make changes to the original file later on if necessary.
The
copyright page has to be done last, because it will need to include the ISBN
that CreateSpace will give you later on.
Alternatively,
if you don't have a vector-based design program, you can select all of the
objects on a page and then hit “combine all objects” in your pixel-based art
program. I suggest doing it the other way, because most pixel-based programs
don’t let you create multi-page
documents, which means you'll have to insert each page into something like Word
before you can convert it into a PDF. There is, however, one advantage to doing
it that way: Amazon Kindle prefers Word documents to PDFs, so creating your
file in Word might make it a little easier to convert your print book to an
e-book. Either way, you'll have to reformat all of your pages later on to fit a
Kindle, which means you'll have to convert all of them to RGB color at 96 dpi
and the right size for Kindle, which is 800 by 1280 pixels for all of Amazon’s
color Kindles to date. (Black-and-white Kindles use a different format, but it
makes more sense to format a full-color children’s book for the Kindle Fire) There
are, however, much easier ways to format a picture book for Kindle. Download Formatting Children’s Books and Comics by
Charles Spender (the fifth file on the list you'll find here)
to learn more. Another option is to use Kindle Comic Creator, as this video explains:
Creating a Picture Book
Using Kindle Comic Creator. CreateSpace does allow publishers to publish to
Kindle easily, pretty much with just the click of a button—but I have learned
from experience that this doesn't work with full-color, fully illustrated
books. It’s just best to format and publish your print book and your Kindle
ebook separately.
Why, you
might be asking, must you convert all your pages to bitmaps or “combine all
objects” on each page? You have to do this because it will lower the size of
your book’s interior PDF file. That’s important, because CreateSpace can only
take interior files that are less than 400 MB. That might seem like a lot, but
30 or more pages at 300 dpi with layers can really add up. Combining layers
into one bitmap makes the file a lot smaller, so you can upload it to
CreateSpace.
Publish It!
So now you have almost everything you’re going
to need to put together those two PDFs and publish your picture book! You still
have to get an ISBN, and you’re going to have to put it on your book’s
copyright page. You can buy your own, but CreateSpace will give you an ISBN for
free, and using CreateSpace’s makes it easier for CreateSpace to distribute
your book to more markets.
So let’s
head to CreateSpace.com now.

Sign in on
the left, or click on the orange “Start a title for free” button if you don't
have an account yet and need to create one.
Once you've
created an account and logged in, you'll be taken to your dashboard, which show
“My Account” on the left, your member ID number, the CreateSpace Message Center
(where you can find the emails that CreateSpace has sent you), your royalty
balance for the current month, a list of your books with their ID numbers and a
place you can click to order copies, and information about how many copies each
of your books have sold so far this month. (Yay, I just found out I sold
another copy of Why
My Love Life Sucks! Thanks, paperback purchaser with excellent taste. You
just made my day.) Click on the button that says “Add New Title” near the top
middle of your dashboard. Or if you've already started creating your book,
click on the book’s name. This will take you to the Project Homepage of that
title.
Here’s one for a picture book I'm working on called Click the Dog:

Let’s ignore the Create and Sales &
Marketing sections for now and focus on the three columns in the middle: Setup,
Review, and Distribute.
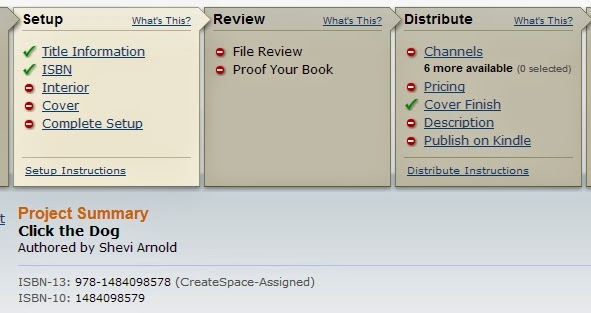 |
| This shows the Project Homepage of a picture book I’m working on called Click the Dog. The green check marks mean that I've completed these stages. The red circles with white lines mean I haven’t done these yet. And anything marked with a clock icon is currently under review with CreateSpace. Note: once you have acquired a CreateSpace ISBN for a project, you cannot change the ISBN for that project. |
Click on
“Title Information” under Setup. Fill in the required information on the next
page (you can tell it’s required because it has an asterisk after it). This
includes your book’s title, the primary author, and the Language of your book.
You’ll also want to click on the drop-down menu for “Add Contributors” to
select “Illustrated by” and then click on the blue “Add” button to credit the
illustrator, too. Look over all the other fields to see if there’s anything
there that you need to fill in because it’s relevant to the particular book you’re
publishing. When you’re done with that, click on the blue Save & Continue
button at the bottom of the page. This will take you to the next page, which is
the one where you can add your own ISBN (if you have one and want to use it) or
get an assigned CreateSpace ISBN.
 |
Setup, Review, Distribute, and Sales & Marketing pages on CreateSpace have this on the left. Here it is with the Setup menu open. This makes it easy to access the particular page you need to go to while you’re working on a book. You can make changes on almost anything while you’re still setting up your book, except for the ISBN. The ISBN remains fixed after CreateSpace assigns you one.
|
Once you
have your ISBN, you can copy and paste the number into your copyright page. And
once you've done that, you can turn that page into a bitmap. And once you’ve
done that you’re now ready to turn the file of your book into a PDF. Yay!
The
vector-design program you’re using may have three ways to do this.
1. You might
see a “Publish to PDF” option in the File drop-down menu.

2. There
might be a PDF option in the Print menu.

3. And you
might be able to choose PDF as a format under Export.

Whichever
way you do it, make sure to check all the options to verify that your PDF will
have 300dpi, be in CMYK, and (if that’s available) made up of bitmaps. Once
you've published, printed, or exported to PDF, open your PDF file in a PDF
reader to make sure that it looks the way you want it to. If it doesn't—for
example, if it's in grayscale or the illustrations don't go all the way to the
edges of the page—go back to your file, try to create a PDF again (possibly
using a different method), and try to see where you might have gone wrong.
Eventually you should be able to create a PDF that’s exactly the way you need
it to be. You’ll also need to create a PDF of the file with your book's front
cover, back cover, and spine. (For more information on creating this file,
check out the article
about illustrating in this series. You can also check out the CreateSpace
article on formatting
your book's cover.)
Now that
you've created the PDFs for your book's interior and its front and back cover,
you’re ready to move onto the next step: uploading your book's interior.

Select “Full Color” under Interior Type, and then click on “Choose a
Different Size” to select the trim size for your book. Then select “Upload your
Book File,” click the blue Browse button, find the PDF of your book’s interior
that you created, and double click on that.

You'll be asked to select whether or not you want the interior pages
to bleed. “Bleeding” means that the artwork will go past the trim size, so that
when the book is trimmed, the artwork will go all the way to the edges of the
page. For most picture books, you'll want to click on “Ends after the edges of the page.” Leave “Run automated print checks and view
formatting issues online” checked. Scroll down and click on the blue Save
button. Your book should now upload. This step will probably take several
minutes, since you are going to be uploading a rather large file.
When it's done uploading, you'll have the opportunity to review the
file online. Look over each page very carefully to see if there's anything
you've missed. There could be a missing period or a word accidentally written
twice. Maybe the text doesn't show up against the background as well as you'd
like it. Use the double page view to check how the odd and even pages that will
go together look side by side. Make sure that everything is exactly how you
want it—because if it isn't, this is the last time you'll be able to easily fix
what needs to be fixed.
The Interior
Reviewer will automatically tell you about certain issues, like if parts of
your books are less than 300 dpi, and which pages have these issues. Make sure to click on each issue so you can
figure out what needs to be fixed and where. If anything does need to be fixed,
you’ll have to upload a new file. Jennifer from CreateSpace put together a list of the
top 10 file specification challenges publishers seem to run into when trying
to upload their books and covers to CreateSpace’s website, so you might want to
check it out if you run into any issues.
 |
| The Interior Reviewer from "Members' Top 10 Specification Challenges" from the CreateSpace forums, article by Jennifer, CreateSpace PrePress. Here you see what happens when an image appears to be placed too close to the edge of a page. |
When the Interior Reviewer no longer finds any issues and you're
completely satisfied with how your picture book looks online, click the blue
Save button at the bottom. If you don't see a Save button at the bottom, try
uploading your book's interior with a different browser. I ran into this
problem with Chrome, but everything was fine when I switched to Firefox.
Once that's done, it's time to save your work and move onto the
cover. You can go there by clicking the blue Save & Continue button at the
bottom or Next at the top or of the Interior page. You can also go there by
clicking on Cover under Setup on the left.

Select glossy or matte. (I don't recommend ordering a sample copy,
since this will not be a copy of your book and it will cost over $6 with
shipping, but that is an option.) If you're not sure which to choose, look at
picture books that you have at home or from your local library. Do they have
glossy or matte covers? If you see both kinds, which do you prefer? I went with
glossy, because that seems to be standard, and I like the way my cover came out,
but it's up to you.
Now it's time to upload the PDF you made with your book's back cover
on the left, the book's spine in the middle, and the book's front cover on the
right. Under “Choose how to submit the cover of your book” select “Upload a
Print-Ready PDF Cover.” Click the blue Browse button, find the PDF of your
cover on your computer, and double click on that.

The maximum
size for your print-ready PDF cover is 40 MB, and if you converted your file to
a bitmap (or combined all objects in a pixel-based art program), your file
should be below that. Once you've successfully uploaded your cover, click Save
& Continue.
This will
take you to Complete Setup, where you'll be able to check everything over and
then submit your book for review. Once you've done that, you'll see a little
clock icon next to File Review on your book's Project Homepage while
CreateSpace is reviewing it. When the review process is done, that clock icon
will turn into a checkmark. You can then order a proof of your book. It's
highly recommended that you do so, but if you’re in a hurry and you're
absolutely sure the book looked perfect when you reviewed it online, you can
skip this stage. I did that with Fay Fairy’s Very BIG Problem,
because I needed copies of the book for a street fair and couldn't afford to
wait. (Unfortunately, it still didn't arrive in time.) The book looked exactly
as it did when I reviewed it online, so I don't regret skipping this stage. Your
book's proof will look almost identical to what your finished book should look
like, except that it will have a page in the back with the word “proof” written
in huge letters.
And now
you're ready to set up your book for distribution. Yes!
I'm going to
speed through this last section, because—unlike the process of putting your
book together, converting it to a PDF, and uploading it—it’s mostly
self-explanatory.


Some of these channels are only available to those with a CreateSpace supplied ISBN, which is another reason why you’ll probably want to use theirs instead of buying your own.

One thing
worth noting about the CreateSpace eStore is that you can give people the link
to your book's page there, along with a discount code that will let them get
your book for less. For example, if you go to https://www.createspace.com/4807674
and enter the discount code JHCCQCWM, you can get Fay
Fairy’s Very BIG Problem for 30% less than the retail price. For the most
part you'll be buying your own books at cost, which is currently $3.65 for a
40-page full-color picture book, but the link and discount code might be useful
if you're trying to give a wholesaler, bookstore, or school a special deal. Of
course, you can also purchase the books yourself at cost and have them shipped
either to you or to the wholesaler, bookstore, or school.
Once you've selected your book's
distribution channels, it's time to set the price. CreateSpace takes all the
guesswork out of this, by telling you what the minimum list price is for your
title is in US dollars, British pounds, and Euros. It also tells you how much
you'll be making in each of the distribution channels based on the prices
you've set. While it might be tempting to set your price high so you'll make
more money for each copy sold, be careful you don't price yourself out of the
market. Paperback picture books tend to be cheap. On the flip side, don't worry
if the minimum list price seems too high. Amazon and other retailers (excluding
CreateSpace's eStore) will almost certainly sell your book at 10% or more off
the retail price.
Finally, you enter the required
information in your book's Description page. This includes the book's description
(up to 4,000 characters and with limited HTML coding, but watch out for
problematic characters, like apostrophes and ampersands); the BISAC category of
your book (probably a subcategory of Juvenile Fiction), which you’ll select
from a menu; your author biography (up to 2,500 words about your qualifications
or reasons for writing this particular book); the recommended grade reading
level for the book; the book’s language and country of publication; and the
five most relevant search keywords for your book.

And that is how you indie publish a
picture book with CreateSpace.
I hope you've found this helpful, and if you have (or if you still have questions), I hope you'll let me know in the comment section below.
Happy writing, illustrating, and publishing!
9 comments:
Dear Shevi, Reading these 4 parts about publishing a picture book was the push I needed to get serious about my book. Thank you so much for explaining all of this.
You're welcome, Hanna! I'm glad to have helped.
Hi Shevi,
Thank you! This has been so helpful! I always have trouble with the spine. I know there are specific dimensions for each size. What is the best way to create one?
Dee
When it comes to a paperback of less than 100 pages, it's best to avoid trying to put anything on the spine. It's also a good idea to go with a background that won't look weird if the spine doesn't exactly align as expected. The printer will tell you how wide the spine is and if it's big enough for the title. If it is, make sure you leave about a quarter inch on either side of the title in case it shifts in one direction or the other. Most online printers will give you a template that will show you where the spine will be (if there is one). Use it and make sure you leave a margin for error. It should be okay. If it isn't, your printer should let you know.
Hi Shevi,
Thanks so much for the detailed, informative post!! It's so useful to read about your experience, and I now have a question for you as someone who has published print versions of your book both through Create Space AND Ingram Spark. I've started the process of publishing my picture book through Ingram Spark. I decided to use them rather than Create Space (now KDP) because I do want to be able to sell through brick and mortar stores as well as online, and also because I'd generally heard that the print quality is slightly better. Having just received some sample Ingram Spark books though (not samples of my own book, just the generic sample books they offer) I see that even with their Premium Color option on their heaviest weight paper (70 lb), they do not offer coated paper and thus their best color printing is not as vibrant as a traditionally published picture book. I wonder how you would compare the relative quality of your printed full color illustrations through Ingram Spark vs. Create Space? (I find myself wondering if those who judge Ingram Spark's printing to be superior are judging on the basis of text-heavy books, rather than picture books.) I'd so appreciate any insights you can offer on this point!
Many thanks,
Lisa
Great question.
Unfortunately, I've only used Ingram for hardcover novels, so I can't tell you how well they handle picture books.
I can tell you my color covers from Ingram didn't handle color as well as my paperbacks from CreateSpace, but that may be because I opted for a hardcover without the jacket.
Hi Shevi,
Thank you so much for these series! This might be a "stupid" question, but if you are hiring a professional illustrator, what would the publishing process look like in that case? Is it exactly the same as you describe above - i.e. I would have to buy a pixel-based art program, ask that the illustrator send me his/her files in that format and go about the steps you describe? or how else would you go about it?
I am an author contemplating self-publishing and have absolutely NO CLUE :-) about any of these art programs... :-)
Thank you!
D.
It would be different in that the illustrator would have to handle all design aspects and give you a digital file, preferably a PDF. Other than that, it's mostly the same. Good luck!
Thanks Shevi! SO this means that the steps explained in the blog from "Create the File for the Interior of Your Finished Book" to "Layout out your book" would be done by the illustrator. And the the steps starting from "Publish it" would be with the author again - correct? Thanks again Shevi! I learned a lot from your posts.
Post a Comment